If you think that clothing photography requires too many skills and resources for an amateur enthusiast, I am here to assure you that this is completely not the case. You don’t even need a mannequin to take attractive and professional-looking pictures of your clothes!
You can take pictures of clothes without a mannequin by laying them flat on a neutral background and taking pictures from above the display. You can also use the invisible mannequin effect, where the clothes appear to be on a person, but the actual person has been edited out of the image.
In this article, I will share three easy ways to photograph clothes without using a mannequin. Read on for detailed instructions on how to get stunning pictures that showcase your items in the most appealing way.
1. Flat-Lay Photography
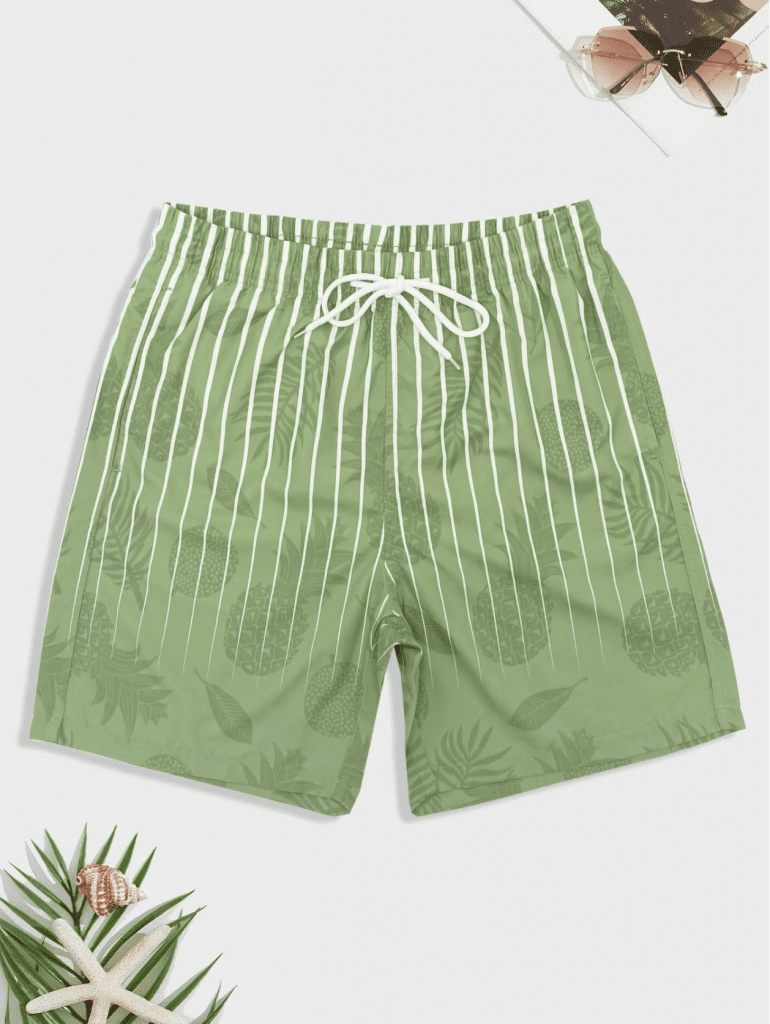
The most common way to photograph clothes without a mannequin is flat-lay photography. It’s self-explanatory: you lay your clothes out on a flat surface and take pictures from above the setup.
While this technique doesn’t allow you to demonstrate how the clothes would actually fit on a person, it opens up a lot of opportunities for your creative vision. Flat-lay photography can look no less professional than if you had a model or mannequin, and it can flaunt your clothes in an eye-catching way that potential customers will be captivated by.
Another significant advantage of flat-lay photography is that it doesn’t require much investment. You can set up a shoot right in your home using things you already have or purchasing inexpensive and practical items to make your photos even more enticing.
Interested in trying this method out? Let’s dive deeper into how you can organize a photoshoot like this.
The Equipment: Backdrop, Lighting & Camera
Start by gathering together everything you’ll need for the shoot. As this method is quite simple, you won’t really need much: only the basics.
First, you need a background for your items. The easiest option is to go with a white backdrop, as it contrasts with most colors and allows you to easily edit your pictures however you like.
You can either invest in a professional backdrop or use a neutral background, like a piece of cardstock paper or a white sheet. A good muslin backdrop will be easier to work with and typically look better in pictures, but it is not necessary for making good photos.
You can also use a backdrop of any color other than white if that corresponds with your vision for the shoot. Just make sure it contrasts with the clothes: you don’t want any details to get lost.
Next, let’s talk about lighting. Natural lighting looks beautiful, and it is entirely free. To take advantage of natural lighting, you might want to set up your display near a large window.
Another advantage of natural light is that it’s extremely easy to work with. The only important thing is to use indirect sunlight, as this will make all details stand out more.
However, if you don’t have the opportunity to use sunlight as the light source for your photoshoot, you can create a lighting setup using regular home lamps. It is best to get bulbs that shed white light instead of warm yellow, and it’s also a good idea to reflect the light from other surfaces. Anything white will work as a reflective surface (for instance, a white shoebox).
And, finally, you need a good-quality camera. If you don’t own a professional camera yet, buying one is not at all necessary. You can borrow one from your friends or rent it for a reasonable price.
It is also possible to take excellent shots using your phone. In fact, if you plan to sell your clothes on Instagram, the app will promote your posts and reels more actively if they are shot on your phone using the Instagram camera rather than with a professional camera.
Preparing and Positioning the Clothes
Next, you need to select the items for the shoot, make them look good, and create a pretty setup that grabs attention. Let’s go through the steps in more detail.
Even if you only need to demonstrate one piece at a time, selecting a couple of other complimentary items is best to create a more harmonious and visually exciting shot. You can add other clothes, a pair of shoes, accessories, books, flowers, or anything that comes to mind and goes well with your main piece.
After that, you need to prepare the clothes. They must be freshly washed and ironed so no wrinkles can spoil the impression. Use a lint roller to remove any dust or hairs, as you want the pictures to retain as many details as possible, and unwanted fibers shouldn’t be among them.
During the shoot, keep an eye on the state of your items and iron or lint roll them as needed, so they look top-notch at every moment you photograph them. You may have to repeat these steps a few times as you go. It’s better and easier to make sure everything looks good at this stage rather than having to edit the wrinkles and hairs out from the pictures later.
And finally, you need to get a perfect composition to create that ideal shot. That’s where it’s all about creativity and your personal vision. You can start with making good basic shots that clearly demonstrate your items, or experiment more with various styles, added accessories, and the way you position the clothes.
The main thing to remember is that people must get an idea of what the item looks like and be able to make out all the essential details. While you want your shot to look attractive, never sacrifice the visibility of your clothes for it.
If you’re confused about where to start with this stage, look for references online and study the ones that look most appealing to you. Try and figure out what it is about them that makes you look at the photo twice or consider purchasing the product.
Look through other examples of flat-lay photography to see how clothes can be positioned and accompanied by other items. Try and recreate a few shots you especially like before experimenting with your own composition style.
Editing
Finally, when you’re done with the photo shoot, it’s time to edit your pictures to minimize possible flaws and create an attractive image.
Editing doesn’t have to be excessively complicated. You can add shadows to give more volume to your items and make them look more realistic, adjust colors and contrasts to retain as many details as possible, and that’s really about it.
This tutorial gives a lot of helpful tips for beginners:
Work with exposure and white balance to make pictures brighter and adjust the lighting. Many apps will also allow you to work with colors separately, which can improve your image a lot, but make sure you don’t go overboard.
As you want the texture of the item to be as clearly visible as possible, you also need to do some editing to bring out all the details. Adjusting contrast is what works best for this purpose. You can either use the contrast slider or work with highlights and shadow sliders separately.
Technically, both methods do the same thing. Yet, contrast changes highlight and shadow parameters simultaneously while adjusting each of the two individually gives you more control and allows for delicate adjustments.
If wrinkles or other imperfections are visible, you will need to remove them using Photoshop. It can be challenging for someone who isn’t familiar with the software yet, but still entirely doable. With the help of YouTube tutorials and some time investment, you can learn all the basics and develop these skills as you go along.
There are other services for beginners that can help do this more easily. For instance, this ZMO.AI remover allows you to remove anything from the picture with just a brush.
You can use it not only for random objects that happened to make their way into your images but for a number of other things, too:
- Dust on a backdrop
- A price tag sticking out
- A wrinkle
And the best part is that this service is free to use.
You can also turn to the help of professionals and have the pictures edited for you. Hiring a specialist is a good idea if you don’t know much about editing and are willing to invest finances rather than time into post-production.
2. Invisible Mannequin Technique
Another common method, though more complicated than the previous one, is using an invisible mannequin technique. This has been a growing trend for some time now but still looks unique and eye-catching, especially with some additional editing on top.
The goal here is to demonstrate how your clothes would look on a person but without an actual person. It’s a great way to showcase your items if you don’t have a mannequin or anyone who can model for the pictures.
What’s more, you can make it look even more interesting by positioning your clothes as if they’re floating in the air, changing the angles, adding a contrasting background, and many other additional touches that can help create a brand image people will be captivated by.
And, of course, one of the main advantages is that you can create these images at home with not much more than you needed for the previous method. Granted, this technique requires more skill and may take you some time to master, but if you’re willing to learn and practice, you’ll be able to figure it out soon enough.
Creating Invisible Mannequin Pictures
To start with, you will need to take a photo of your item. The process is similar to that described in the previous method; however, this time around, you will need to bring a friend to wear the clothes or hold an item for you.
Use a clear white background for this, so it is easier to edit later. Then, you will need to remove the person from your photos, and as a result, you will get the invisible mannequin effect. Watch this tutorial to learn how to do it smoothly if you’re not familiar with Photoshop:
It’s not something that is easy to get right on the first try, yet you will likely be able to do a good job with it after some practice. When you feel more confident about your skills, you can start experimenting with other aspects, such as angles, shapes, and colors.
Hiring a Designer
On the other hand, you can get professional help and hire a specialist to do the editing for you. You’ll only need to take the actual pictures, but the most challenging part of the job will be off your shoulders.
A skilled designer will also help you with developing a cohesive visual concept and further editing. There’s a lot you can do with this technique, and an experienced person can take full advantage of the opportunities it gives for creating stunning images.
3. AI-Generated Model Pictures
Finally, there is a quick and easy method that allows you to get model pictures without actually creating pictures or hiring a model.
There is an amazing service that creates AI-generated model pictures with your items. It is inexpensive, highly customizable, and gives quick, professional results. If you’re looking for a way to save time and money and still get great images, try this product out.
Demonstrating clothes on a model is arguably the best way to show them to potential clients. People can see how the items fit, look at them from different angles, and understand all they need to know about the piece before deciding to buy it.
However, hiring a model and organizing an entire shoot is an extremely tiresome and costly process that not many people can afford. ZMO.AI solves this problem beautifully, allowing you to get professional shots without having to go through all the hassle.
What’s more, you decide how the model will look, including ethnicity, facial features, and body type. This allows you to create an inclusive brand and increase diversity, which is another great way to attract more customers and also an important contribution to the overall visibility of diverse models in clothing advertising.
Sources
- The Clipping Path Service: How to Take Pictures of Clothes Without Mannequin?
- Zenith Clipping: How to Take Pictures of Clothes without Mannequin
- Cut Out Bees: How to Take Pictures of Clothes Without a Mannequin
- YouTube: fatmaasays: Lightroom | Minimal Flat lay Editing
- ZMO.AI: home page
- ZMO.AI: ZMO Remover


