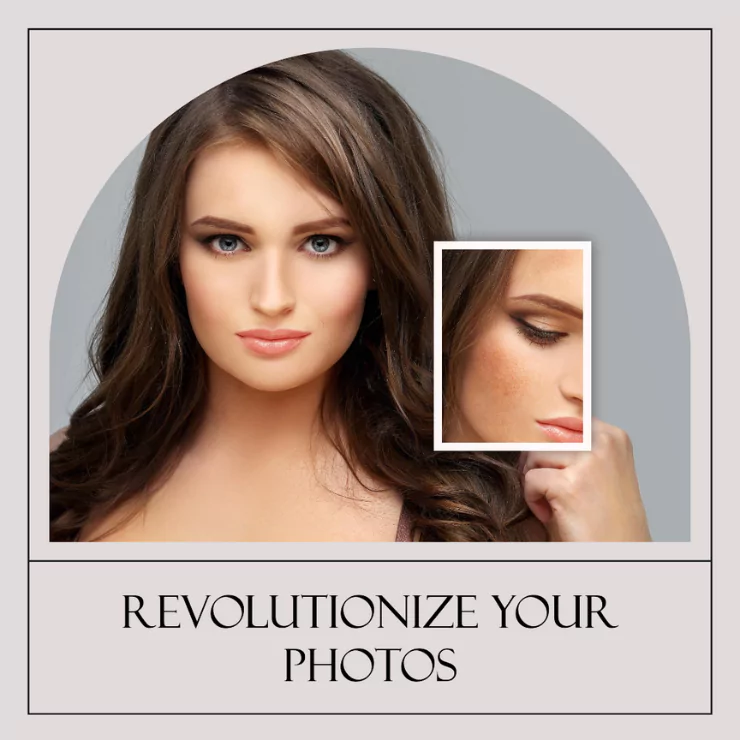

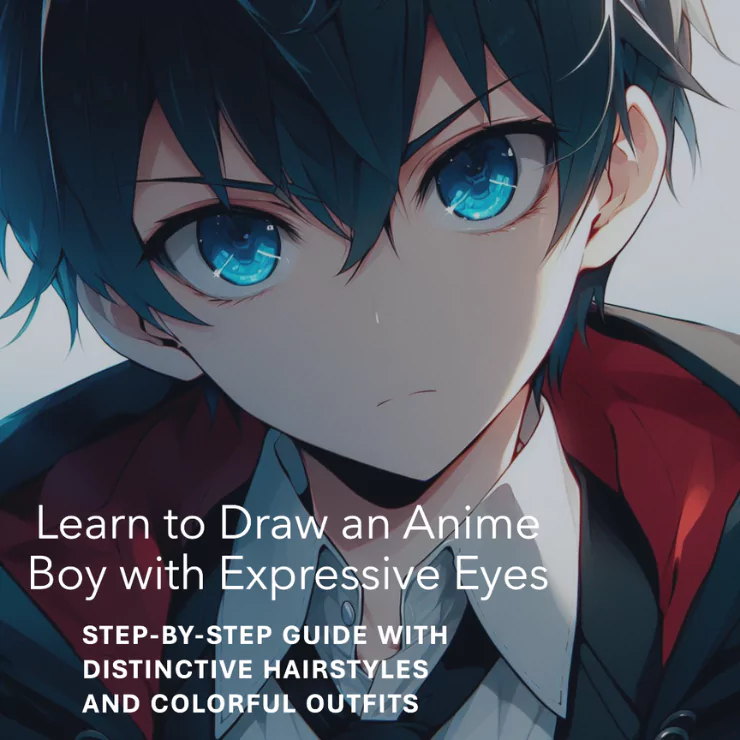
Anime is a famous animation style developed in Japan with a worldwide fan base. Anime characters are known for their expressive eyes, distinctive hairstyles, and colorful outfits. If you want to learn how to draw an anime boy, you can follow this simple tutorial to guide you through the basic steps of sketching, outlining, and coloring your drawing.
How to Draw an Anime Boy
To draw an anime boy, you will need a pencil, an eraser, a ruler, and some paper. You can also use a drawing software or app if you prefer. Here are the steps to follow:
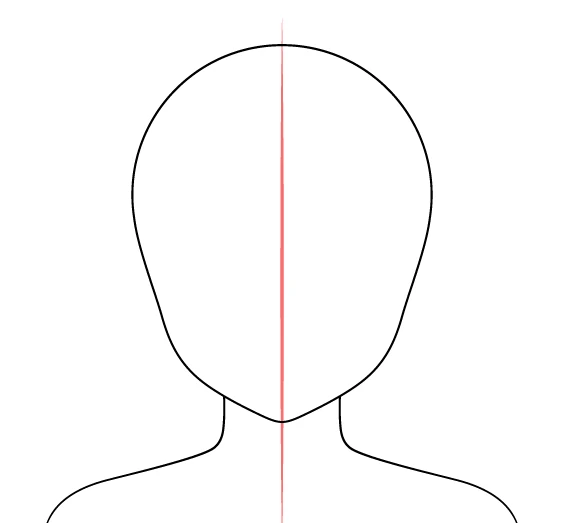
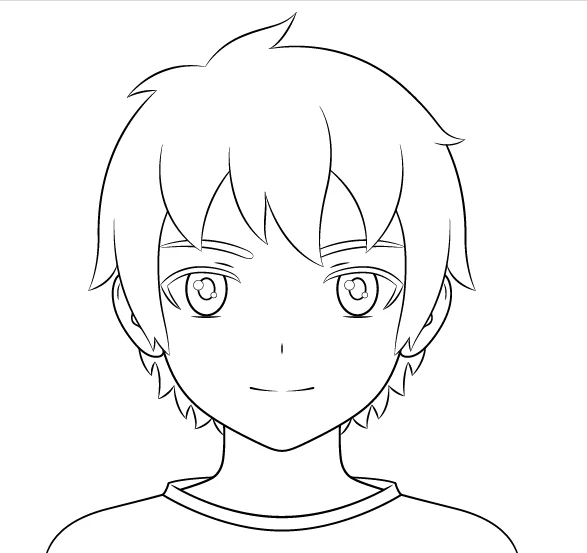
Step 1 – Outline the Boy’s Head, Neck & Shoulders
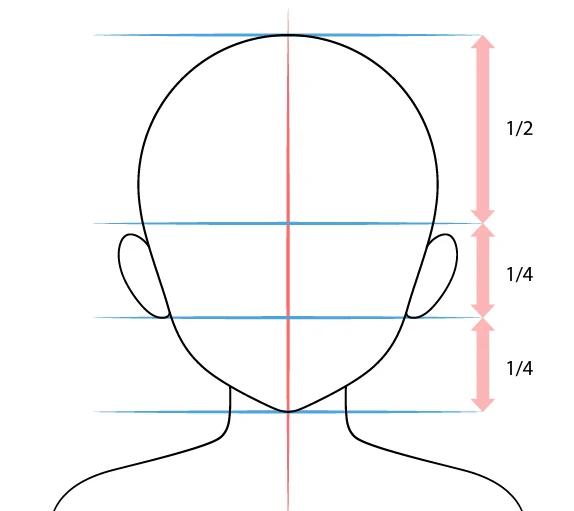
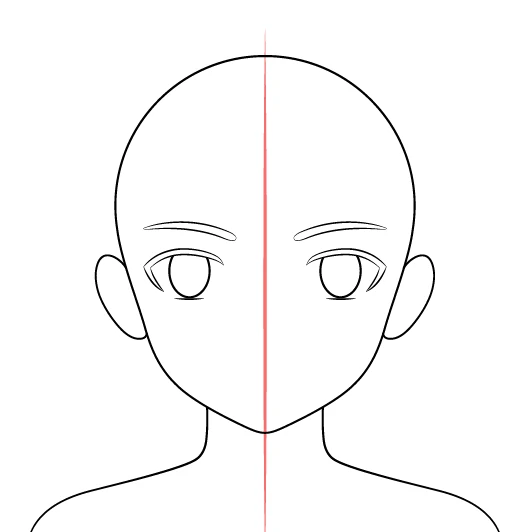
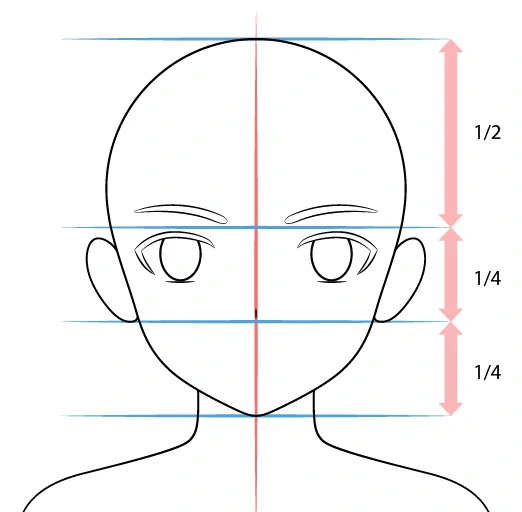
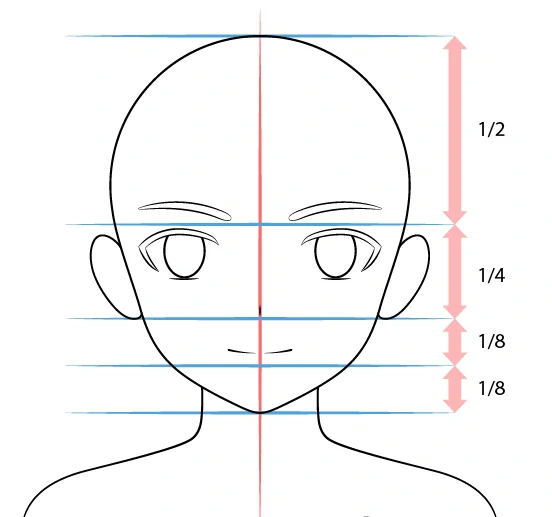
To draw a basic head and shoulders figure, start by sketching a circle for the head, with intersecting vertical and horizontal lines marking the center. Below the circle, add a curved line to represent the chin and jawline. Extend two lines from the sides of the head down to indicate the neck. Then, draw two curved lines from the neck outwards towards the edges of the paper to depict the shoulders.
Step 2 – Draw the Ears
Draw two oval shapes on the sides of the head for the ears. The top of the ears should be aligned with the horizontal line, and the bottom of the ears should be aligned with the chin line.
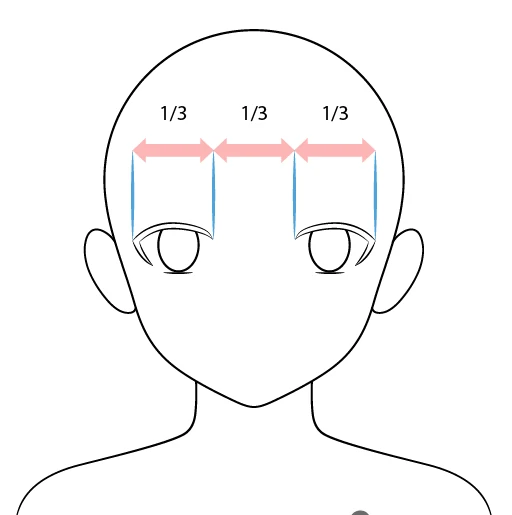
Step 3 – Draw the Eyes
Draw two almond-shaped curves above the horizontal line for the upper eyelids. The space between the eyes should be about the same as the width of one eye.
Draw two smaller curves below the horizontal line for the lower eyelids. The lower eyelids should be closer to the horizontal line than the upper eyelids.
Draw two circles inside the eyes for the irises. The irises should touch the upper and lower eyelids.
Draw two smaller circles inside the irises for the pupils. The pupils should be slightly off-center towards the nose.
Draw two tiny circles inside the pupils for the highlights.
Draw two thin curves above the eyes for the eyebrows. The eyebrows should follow the shape of the eyes and be slightly raised at the ends.
Step 4 – Draw the Nose
Draw a small curve below the horizontal line for the nose. The nose should be close to the vertical line and slightly above the lower eyelids.
Step 5 – Draw the Mouth
Draw a short line below the nose for the mouth. The mouth should be slightly curved and close to the chin line.
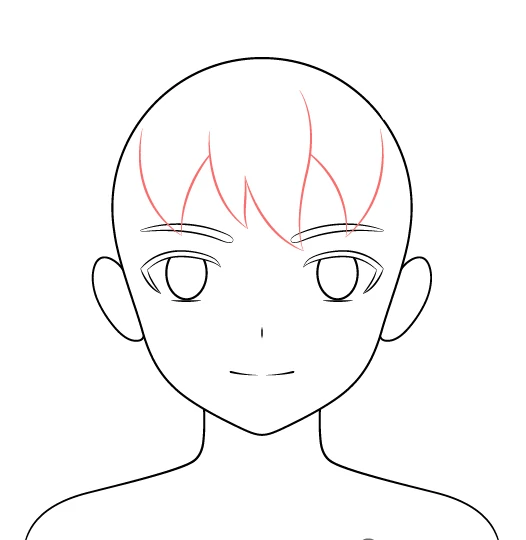
Step 6 – Draw the Hair Along the Forehead
Draw a zigzag line along the top of the head for the hairline. The hairline should be above the circle and cover the ears partially.
Draw some curved lines from the hairline to the forehead for the bangs. The bangs should be uneven and cover the eyebrows partially.
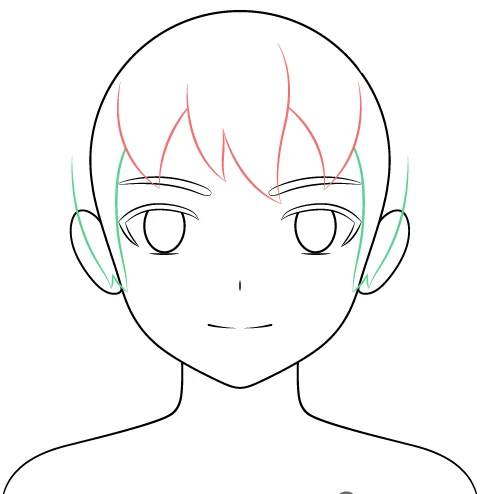
Step 7 – Draw the Hair Along the Sides
Draw some curved lines from the hairline to the sides of the head for the sideburns. The sideburns should be longer than the ears and cover them partially.
Draw some curved lines from the sideburns to the shoulders for the side hair. The side hair should be longer than the neck and cover it partially.
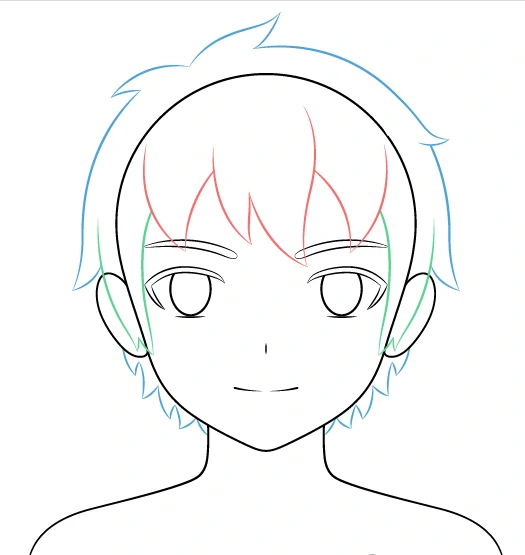
Step 8 – Draw the Hair on Top & in the Back
Draw some curved lines from the hairline to the top of the head for the top hair. The top hair should be spiky and point upwards.
Draw some curved lines from the top hair to the back of the head for the back hair. The back hair should be spiky and point downwards.
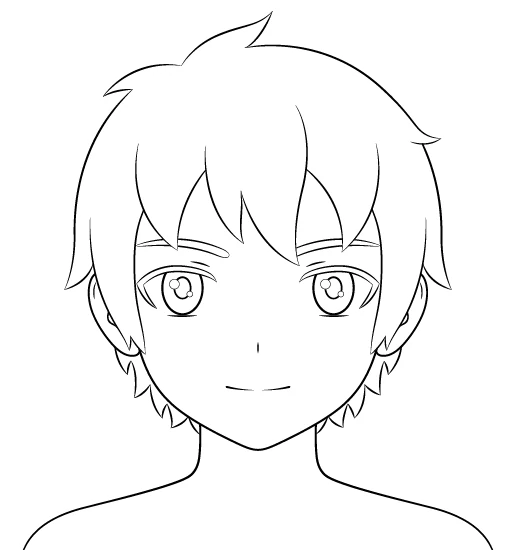
Step 9 – Draw the Eye/Ear Details
Draw some curved lines inside the eyes for the eyelashes. The eyelashes should be on the outer corners of the eyes and point outwards.
Draw some curved lines inside the ears for the ear details. The ear details should follow the shape of the ears and show the inner folds.
Step 10 – Draw the Clothes
Draw a V-shaped line below the neck for the collar of the shirt. The collar should be close to the chin and open at the front.
Draw two curved lines for the shirt’s sleeves from the collar to the shoulders. The sleeves should be loose and cover the upper arms.
Draw some curved lines from the sleeves to the sides of the paper for the body of the shirt. The shirt should be loose and cover the torso.
Draw some curved lines along the edges of the shirt for the folds and creases. The folds and creases should show the movement and shape of the shirt.
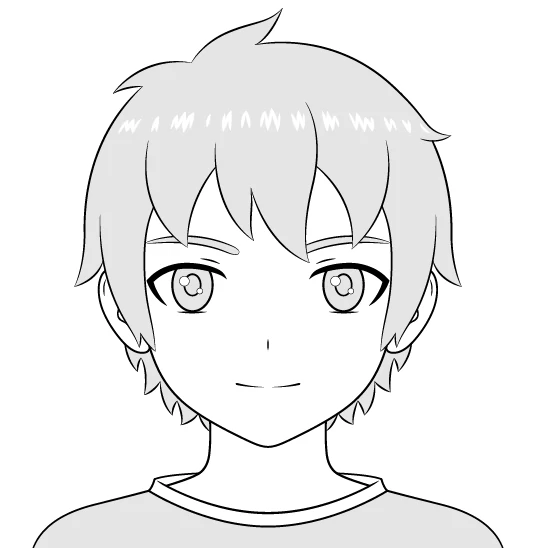
Step 11 – Add Shading to Finish the Drawing of the Boy
Erase the guidelines and the extra lines from the drawing. You should have a clear outline of the anime boy.
Choose a color scheme for the anime boy. You can use any colors you like, but make sure they match and contrast well.
Fill in the base colors of the anime boy. You can use a solid color or a gradient for each drawing part.
Add some shadows and highlights to the anime boy. You can employ a darker or lighter shade of the base color for each part of the drawing. The shadows and highlights should show the light source and the depth of the drawing.
Add some details and effects to the anime boy. You can use a different color or a pattern for the eyes, the hair, the shirt, or any other part of the drawing. The details and effects should make the anime boy more unique and interesting.
Quick Way to Draw Anime Boy
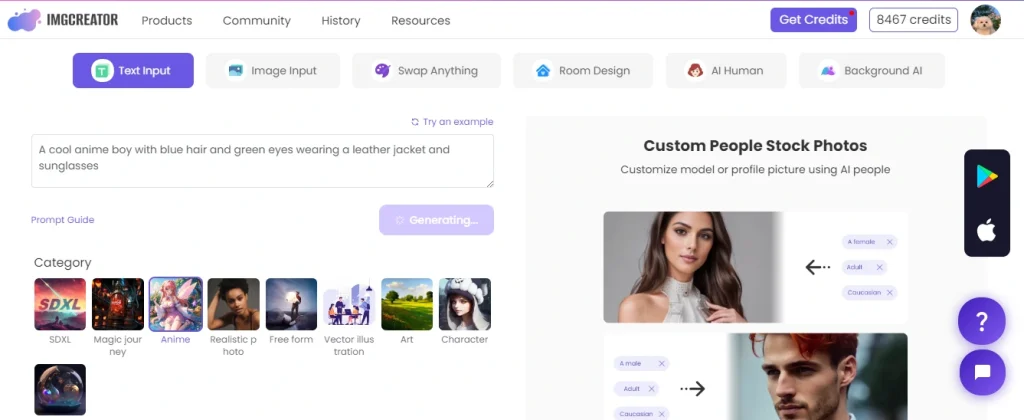
If you want to draw an anime boy quickly and easily, you can use an AI tool that can generate anime images for you. One such tool is ZMO.AI’s Anime Generator, which is a free online service that can create anime characters based on your prompts. Here is how to use it:
Step 1
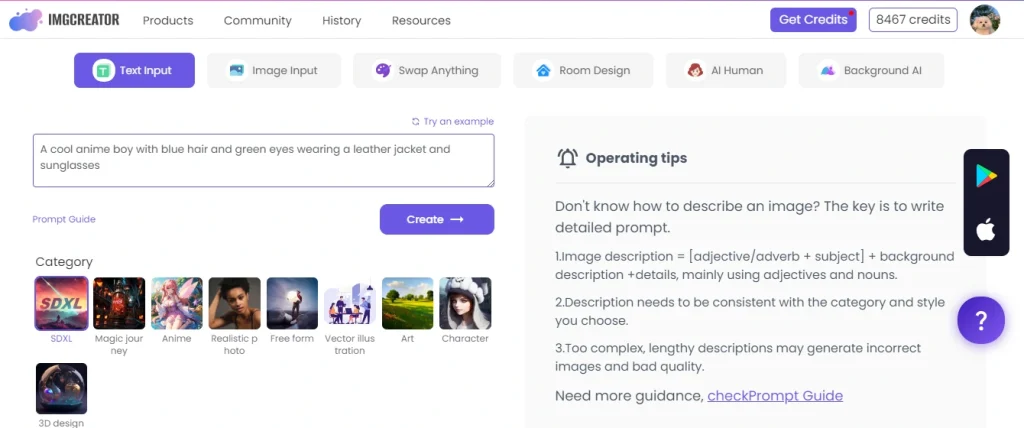
Go to ZMO.AI’s Anime Generator from the menu of the ZMO.AI website. You will see a page with a text box and a “Create ” button.

Step 2
Give a prompt that you want to generate. You can describe the anime boy’s appearance, personality, pose, background, or any other feature you want. For example, you can write, “A cool anime boy with blue hair and green eyes wearing a leather jacket and sunglasses.”
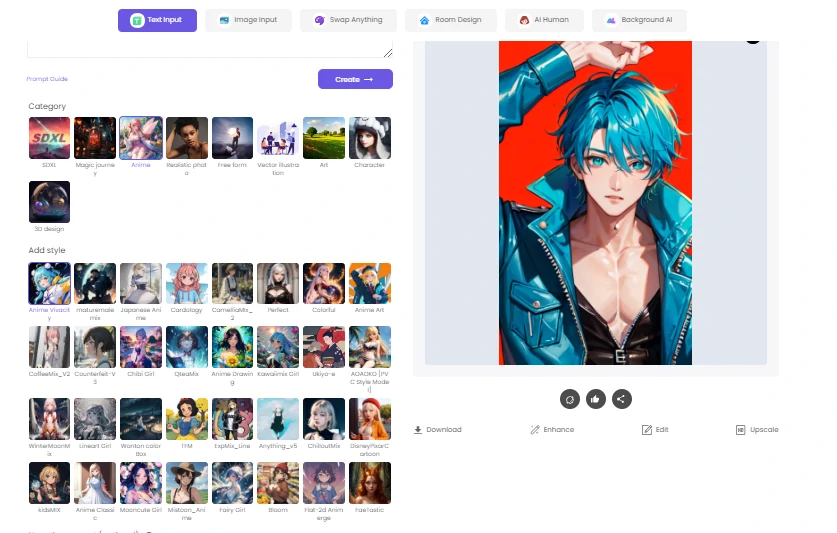
Step 3
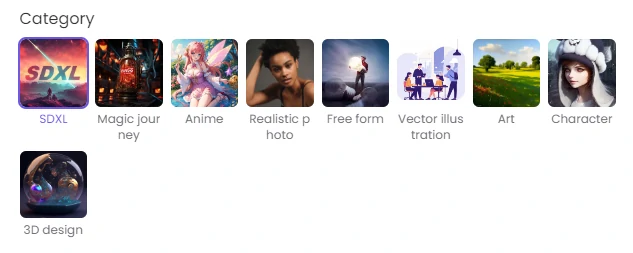
Select a category. You will see different categories of images that you can generate. Choose the one that matches your prompt. For example, you can choose “Anime” for anime characters.
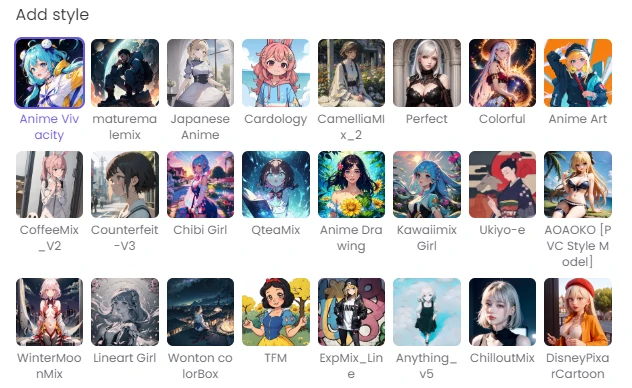
Step 4
Add a style if you want. Depending on your preference, you can select Perfect or colorful.
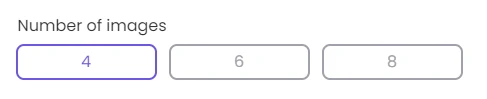
Step 5
Select the number of images you want. You will see a slider that lets you decide how many images you want to develop. You can generate up to 8 images at a time.
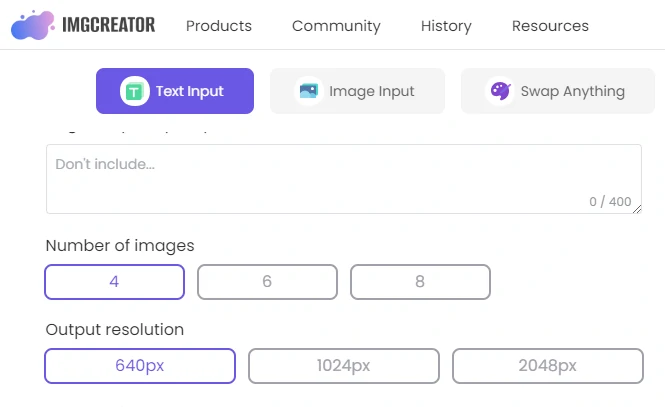
Step 6
Select the resolution you want.
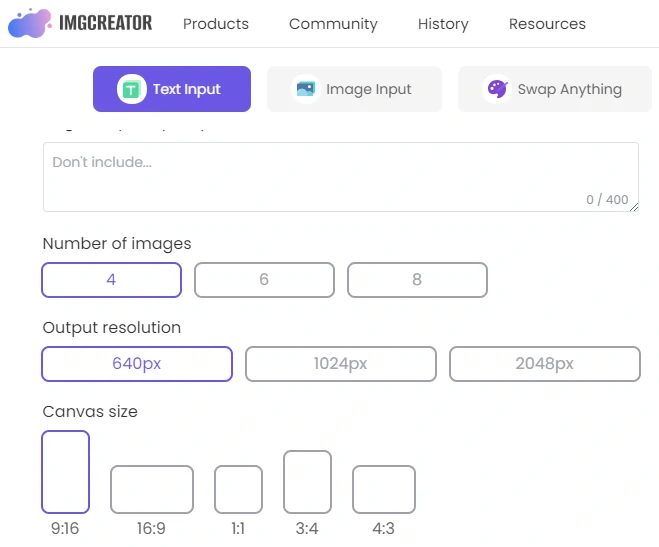
Step 7
Select the canvas you want. You can choose from small, medium, or large canvas depending on your need.
Step 8
Click on the “Create” button. You will see a loading that shows the progress of the generation. Wait for a few seconds until the generation is complete.
Step 9
Download the images you like. You can click the download icon.
Feature of ZMO.AI Anime Generator
ZMO.AI’s Anime Generator is a powerful and easy-to-use tool that can help you create fantastic anime images in minutes. Here are some of the features of this tool:
It uses advanced AI technology to generate high-quality, realistic anime images based on your prompts.
It allows you to customize the category, style, number, resolution, and canvas of the generated images according to your preference.
It offers a variety of anime styles and genres that you can choose from, such as fantasy, sci-fi, horror, romance, comedy, and more.
It provides a user-friendly and instinctive interface that makes the generation process simple and fun.
It is free and online, so you don’t need to download or install anything to use it.
Conclusion
Drawing an anime boy involves several steps, from outlining the head to adding intricate details like eyes, hair, and clothing. However, if you’re looking for a quicker and easier way to create anime characters, ZMO.AI’s Anime Generator is an excellent choice. This AI-powered tool generates high-quality anime images based on your prompts, offering customization options for style, resolution, and more. With its user-friendly interface and various anime genres, ZMO.AI’s Anime Generator provides a convenient solution for artists and enthusiasts. Try it out to streamline your anime character creation process effortlessly.