


The primary source of red eye in images is light reflecting off the retina located in the back of the eye, which happens when the eye is directly illuminated by a camera flash. Because the retina has an abundant blood supply, the reflected light appears red. The proximity of the flash to the lens axis, the size of the pupil, and the angle between the camera lens and the flash are some of the factors that contribute to its prominence. Avoiding direct flash, turning on ambient lighting, or utilising camera anti-red eye capabilities are some methods for reducing red eye. Experience shows you how to make little changes for the best outcomes.
As red-eye incidents become less common due to the reduced popularity of flash photography, they can still happen under certain circumstances. With the invention of strong photo editing tools like Adobe Photoshop and AI software like the renowned ZMO photo editor tool and generative fill, red flashes stand no chance of dampening the beauty of modern pictures. Let us investigate how to correct red eyes using Photoshop’s red-eye removal tool and ZMO. Let’s jump right in:
How to Remove Red Eye with Adobe Photoshop: Manual Method
While red-eye effects in photos can be effectively removed by automated programmes, learning how to use Photoshop’s manual method gives you more control and accuracy over the cleanup process. Photographers can fine-tune alterations based on the specifics of each image by using manual removal, which guarantees a smooth and natural outcome. In this article, we’ll explore the finer points of manually eliminating red eyes in Photoshop, equipping photographers with the knowledge and abilities to carefully and meticulously improve the quality of their photos.
Step 1:
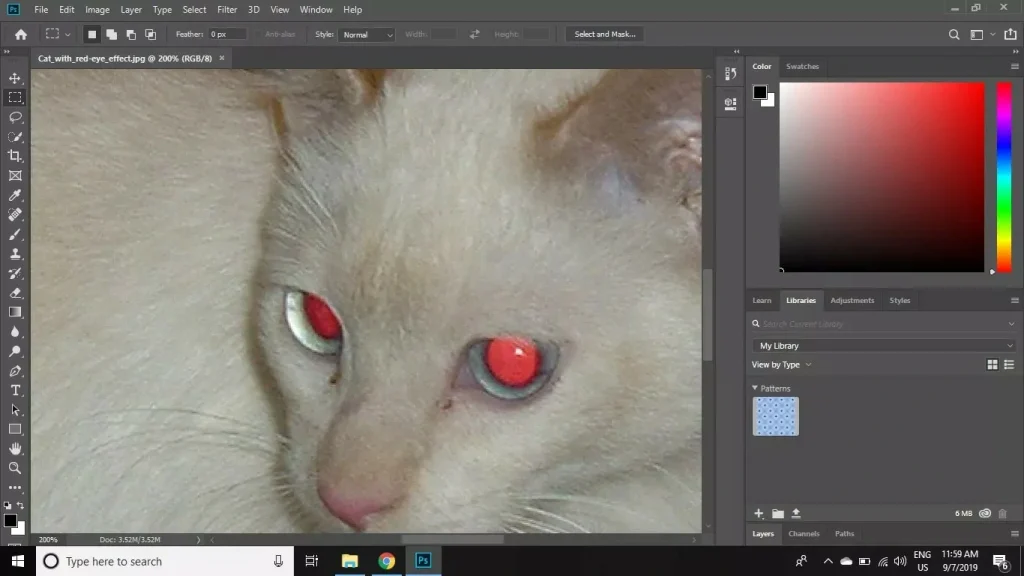
Open the desired photo in Photoshop and begin working. To ensure accurate targeting for the manual removal process, zoom in on the image and concentrate just on the areas that are impacted by red-eye discoloration.

Step 2:
Click and hold the eyedropper tool in the toolbar to open the colour sampler tool. From the drop-down menu that appears, choose the Colour Sampler Tool.
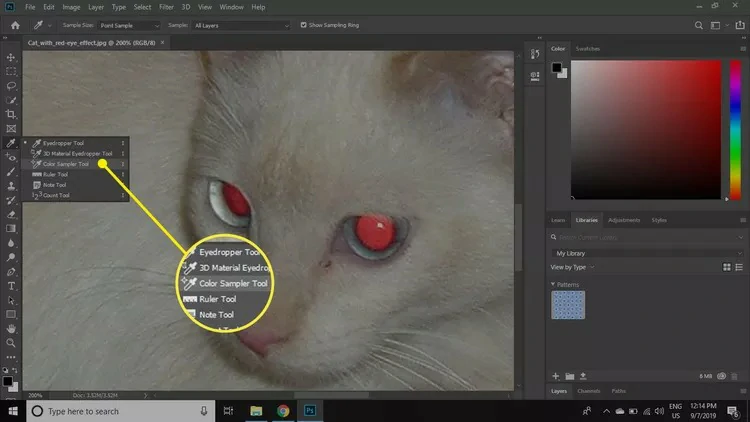
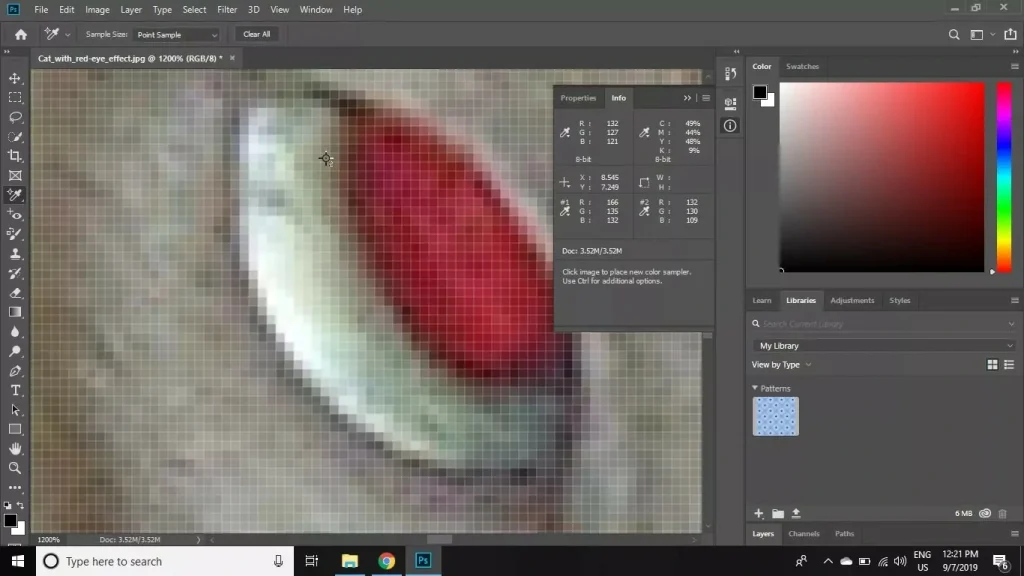
Step 3:
To ensure accurate targeting and a smooth restoration of the eye’s natural appearance, carefully choose an area of the iris where remnants of the original colour are apparent.
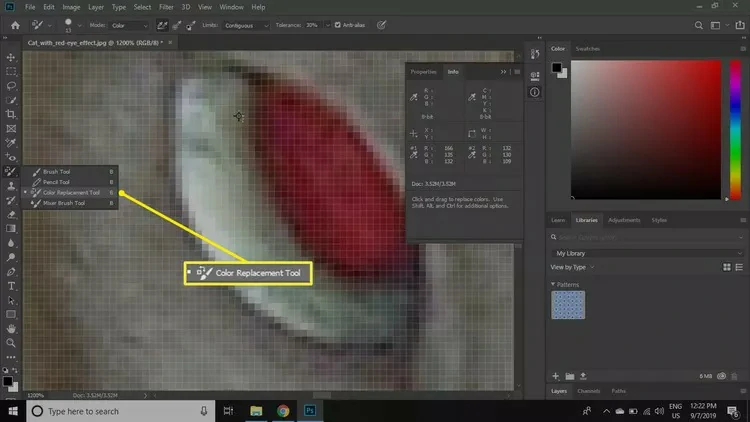
Step 4:
Select the Colour Replacement Tool from the drop-down menu by clicking and holding the Brush tool icon in the toolbar. With the help of this tool, you can precisely modify the colour of specific sections in your image.
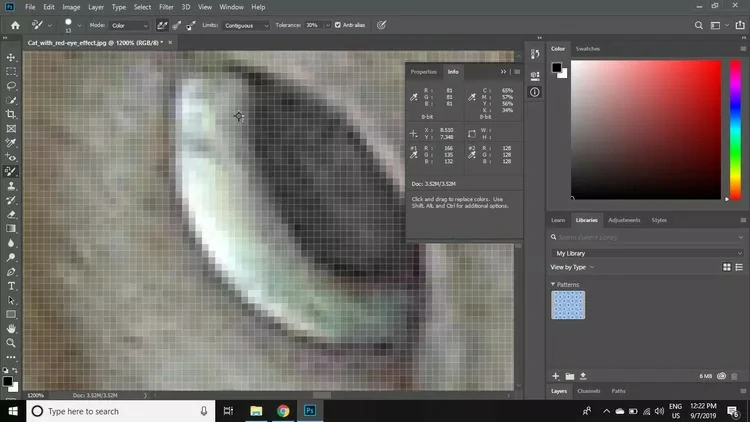
Step 5:
Use a soft brush tool to paint over the red areas of the eyes. Use the rubber tool to carefully wipe away any extra colour that seeps past the iris. To improve contrast, use the Photoshop Burn tool to make the pupil area as dark as you like.
Step 6:
Proceed by selecting the “Filters” tab from the Photoshop toolbar, then navigate to “Blur” and choose “Gaussian Blur” to refine the red-eye correction with smooth and controlled blurring effects.
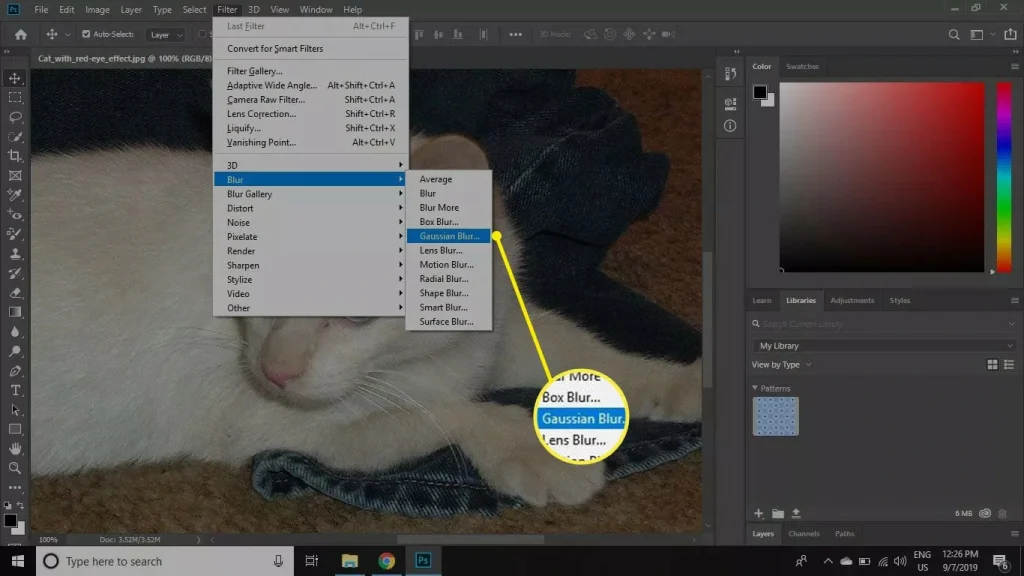
Step 7:
Adjust the radius to 1 pixel to delicately soften the edges of the painted region on the layer. Click OK to confirm the settings and seamlessly integrate the corrected red-eye effect into the image.
After achieving the desired outcome, you have the option to save the file in PSD format or in any preferred image format, ensuring the preservation of your meticulously edited photograph.

How to Remove Red Eye with Adobe Photoshop: The Red Eye Tool Method
To quickly remove the appearance of red eyes in photos:
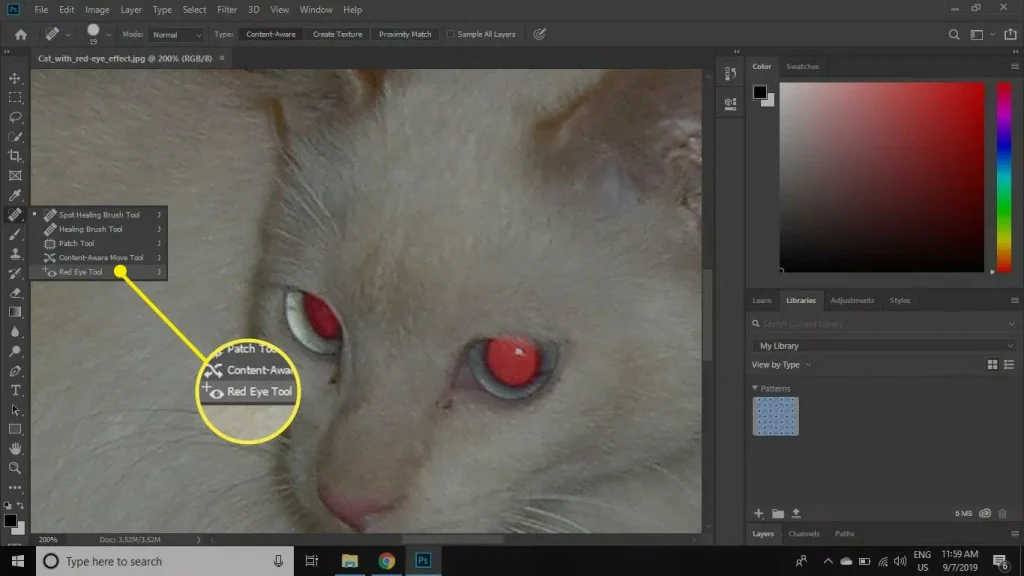
1. To start, open the picture and enlarge it so that you can see the red eyes clearly.
2. Proceed cautiously, making sure you are accurate and precise, to the impacted region. To access the Red Eye Tool in Photoshop, click and hold the Healing Brush tool, then select the Red Eye Tool from the drop-down menu that appears.
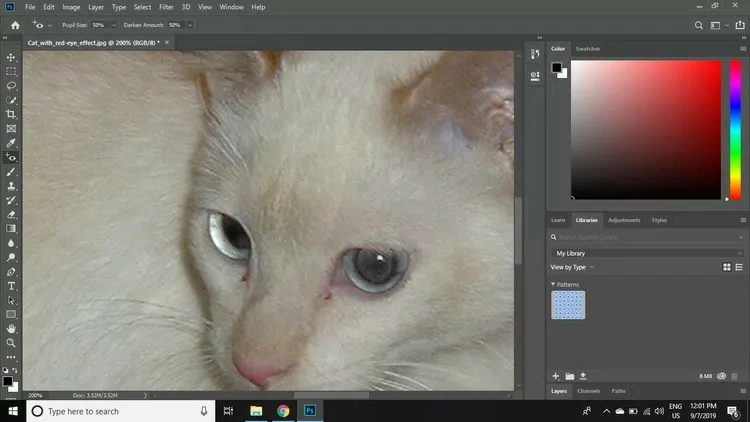
3. Choose the red eyes in the picture and see how they turn into normal-looking eyes. Expand the region that the tool affects by using the Pupil Size setting in the tool settings bar. To achieve the best corrective results, adjust the Darken Amount setting to lighten or darken the result.
How to Remove Red Eye with ZMO Photo Editor and Generative Fill
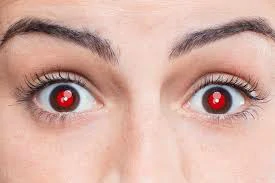
To accurately describe how to remove red with ZMO’s generative fill, we will use the picture below as a spectacular case study:
ZMO offers generative fill functionality, which serves to remove aspects of the picture or add foreign items to them. This singular capability of ZMO distinguishes it from several other software and applications. Users may easily crop off unwanted portions of photographs using ZMO’s generative fill feature and then create contextually appropriate material to fill in the gaps.
This new feature improves picture editing processes by making sure that the full image is described, not just the parts that have been removed. ZMO creates visually appealing compositions with little effort on the part of the user by using sophisticated AI capabilities to automatically analyse image content and generate realistic and coherent fills.
Step-by-step Guide
- Choose the picture you want to edit. Ours will be the one above.
- Go to the ZMO’s generative fill webpage and login with your details, or sign up if you are new.
- Next, click on the “Try Generative Fill Now” link, which redirects you to a new page.
- Once redirected to the new page, navigate to the upload button and proceed to upload your already selected photo. Once uploaded, your picture should appear similar to the one below:
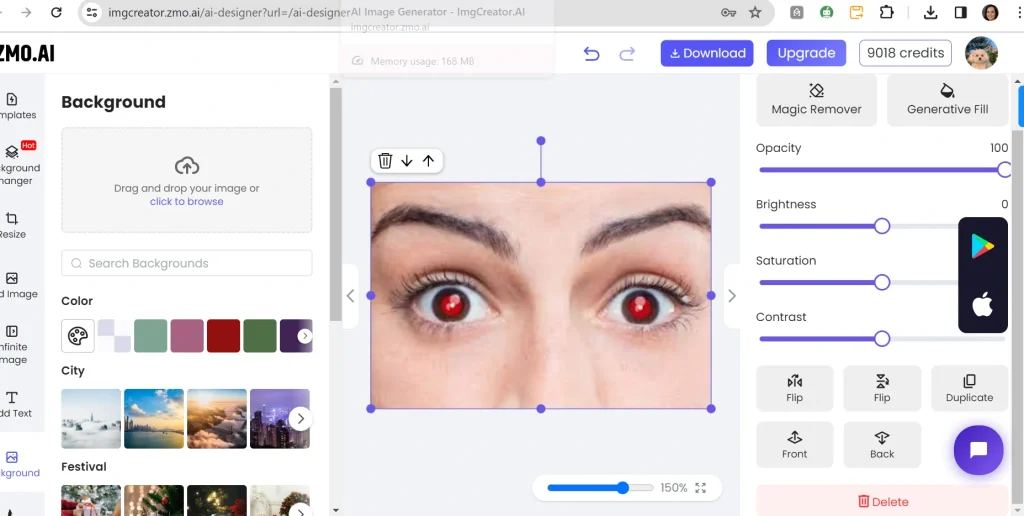
- Proceed to click on the “Generative Fill” button on the top right corner of the page.
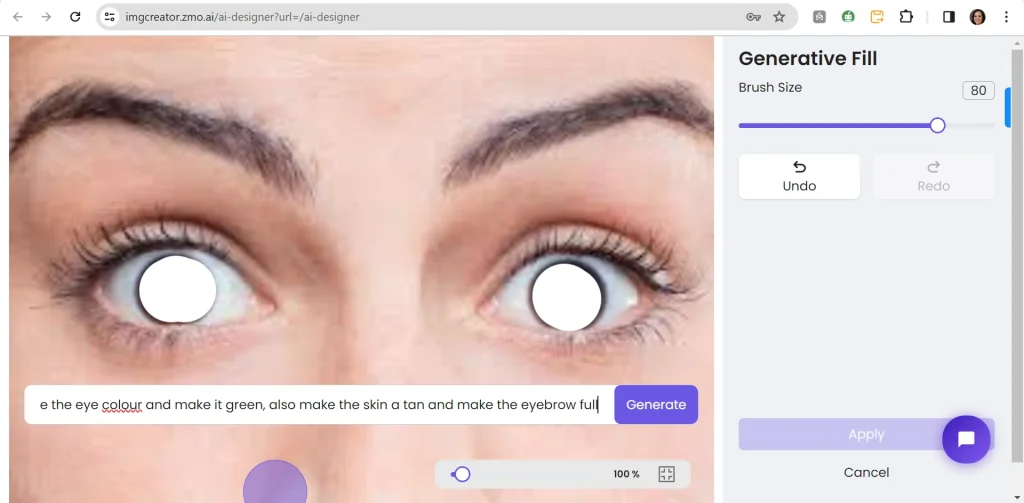
- Once the new page loads, proceed to map out the area that needs editing and give your command accordingly. You can also change aspects you do not want in the photo.
Here’s our example:
Prompt:
Change the eye colour; make it green. Make the skin a bit tan, and make the eyebrows full.
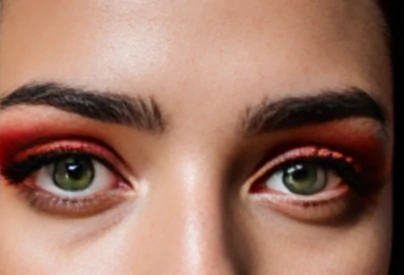
Result:
Related Questions
- What Causes Red Eye in Photographs?
Red eyes look like red pupils as a result of the camera flash reflecting off the retina in the back of the eye. Since the pupils are dilated, more light may reach the retina, making this effect especially evident in low light.
- How Can I Prevent Red Eye in Photos?
To reduce the likelihood of red eye, avoid using direct flash whenever possible. Instead, opt for indirect or bounced flash photography. Additionally, increasing ambient lighting can help minimize pupil dilation, thereby reducing the chances of red eye occurring in your photos.
- What are the benefits of using the red eye removal tool in Photoshop?
Red eye removal in images may be quickly and effectively fixed with Photoshop’s Red Eye Removal Tool. Without requiring intricate manual adjustments, users can quickly restore a natural appearance to their eyes by just selecting the tool and clicking on the red-eye areas.
Summary
Being proficient in red-eye removal is more than just a technical ability; it shows how committed the photographer is to accuracy and compelling imagery. Improving the quality and impact of photographic imagery is the same objective, whether using manual methods in Adobe Photoshop or utilising the sophisticated features of AI-driven solutions like ZMO. Anyone can perfect their skill and become more adept at capturing situations with emotion and clarity with each adjustment. Continue to strengthen your craft, knowing that every adjustment you make will get your photos closer to their ideal state, especially with ZMO a click away.